How to Seal the Gap between your Garage and Driveway

Last updated on March 20th, 2023
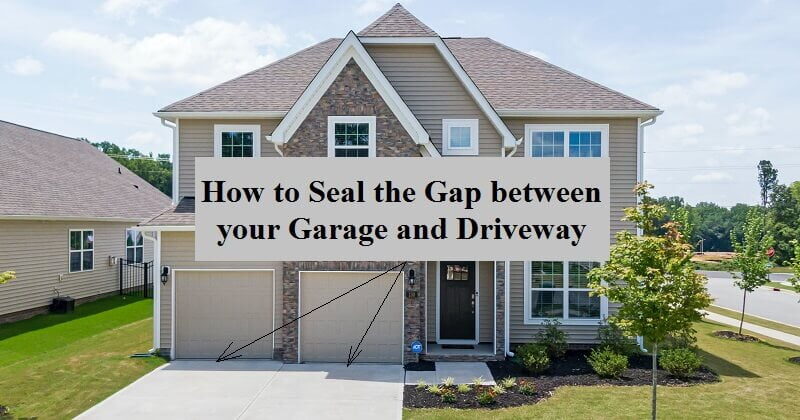
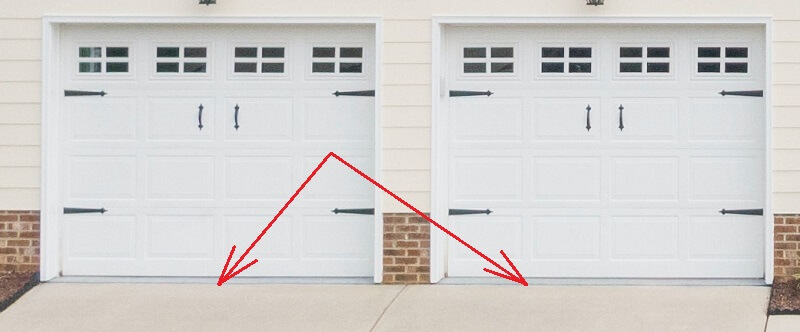
Many home owners wonder about that gap between their garage floor and driveway. What is it? What is its purpose? How to fix or seal it? And how to maintain it?
In this article, you will find out the answers to these questions, in addition to a concise glance to their technical explanation.
What is that gap between your garage and driveway?
The technical term for this gap is “joint”, in particular an expansion/isolation joint. Mainly, such joints are planned and intentionally formed to serve a specific purpose.

What is its purpose?
The main purpose of this gap is to allow movements between the garage floor and the driveway. Thereby, it opens and closes on a cyclical basis. Mainly, these movements are due to volumetric changes in concrete (due to temperature), or due to loading conditions. Besides, this joint also serves as a contraction joint, another type of concrete joints, which relieves shrinkage stresses. In fact, the movements can be relatively slight, but can cause cracks in concrete. For this reason, this “gap” is essential and plays a major role in preventing cracks.
The typical installation and configuration of the gap between your garage and driveway
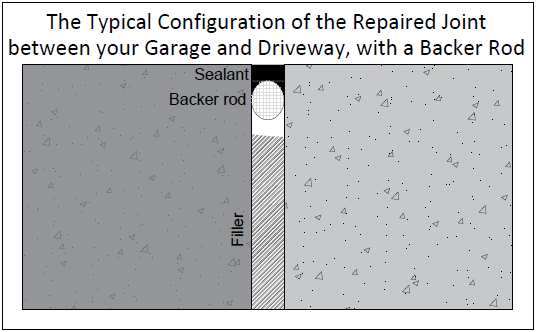
In general, when builders are forming the driveway, they place a compressible filler material at the face of the existing garage slab. Thereby, when they pour and finish the driveway, this filler will represent the interface between the existing slab and the driveway, forming the joint. This filler material remains in place to prevent the intrusion of incompressible materials and water to some extent. Sometimes, such joints are left this way, with an exposed filler material.
However, a better practice is to apply a sealant also. In this case, builders use a filler material with a removable top portion, or form it. Then after pouring, they remove the top portion in order to create the necessary space for the sealant. In fact, this system has a better overall performance, and is the basic standard for such joints.
Should you seal it?
Regardless of the filling and sealing system of this expansion/isolation joint, it will eventually require maintenance. For example, an exposed filler material can degrade with time and exposure, or the sealant can suffer from failures, leaving the joint open and exposed. Hence, without proper maintenance, this “gap” becomes aesthetically unappealing, with leaves, debris, and dirt filled in, and can even turn to be a tripping hazard. Ultimately, this can reduce the effectiveness of the joint and cause additional problems.
Usually, homeowners start wondering about fixing or sealing this gap between their garage and driveway after it starts causing problems, either aesthetic, safety, or performance. Thereby, at this stage, yes you should seal or reseal the joint.
How to “fix” or seal the gap?
Sealing the gap between the garage and driveway does not require high skills, but simply a proper application procedure. This procedure includes three main steps:
- Assessment.
- Surface preparation.
- And application of the sealant.
However, before getting into the explanation of each step, let us first list the common materials or tools that might be required for this project.
- Gloves.
- Measurement tape or ruler.
- Small wire brush.
- Utility knife.
- Shop vacuum cleaner.
- Backer rod.
- Masking tape.
- Sealant/caulking gun.
- Sealant
Step #1: Assessing the condition of the gap
The first step is to closely assess the condition of the joint. Specifically, you should be looking for defects, edge spalling, contamination, moisture, condition of the filler material and sealant (if present), etc. Then, based on this assessment, you can know the extent of necessary maintenance and repair works. In addition, measure and note the width of the gap.
Step #2: Preparing the surface
Surface preparation is always essential for a satisfactory performance of the sealant. In this step, you should repair defects and clean the surface from any materials that can negatively affect the bond of the sealant.
- First, use the shop vacuum cleaner or compressed air to preliminary clean the gap from leaves, debris, and dirt.
- Second, if there is a failed sealant, pull it out of the joint.
- Third, after removing the sealant (if present), you will get to the filler material. If it is in a bad condition, like having pieces chipping off or being detached from the edges, use a utility knife or screwdriver to remove it out.
- Fourth, clean the gap again using a shop vacuum cleaner.
- Fifth, use a small wire brush to clean and remove any loose materials from the gap and its walls. In addition, if any type of sealers, such as acrylic, is present in the gap, specifically on its walls, it should be removed.
- Sixth, if there are any contaminants, oil stains, or materials which can impart the bond of the sealant, clean or remove them accordingly.
- Seventh, if there is a major edge spalling, consider patch repairing it before applying the sealant.
- Eighth, it is time to give the gap its final cleaning, using preferably a non-oil compressed air, otherwise thoroughly clean it using a shop vacuum cleaner and a soft brush.
- Ninth, make sure that the surface is dry prior to applying the sealant.
- Tenth, some sealant products require priming first. In this case, apply the primer following the manufacturer’s recommendations.
- Eleventh, protect the adjoining surfaces of the joint with a masking tape to prevent any staining.
Step #3: Applying the sealant
When applying the sealant, it is important to achieve a good shape factor. For example, the depth of the sealant should be half its width. To illustrate, if the gap is 3/4 inches wide, then the depth of the sealant is best to be about 3/8 inches. In general, if the joint already had a filler and sealant, and you just removed the sealant in the previous step, then this shape factor should be almost already met. Otherwise, you can use a backer rod to help achieve the necessary shape factor, and reduce the amount of the required sealant, especially if part of the filler is removed or the gap is totally free of any filler material.
- First, based on the previous explanation, you can use a backer rod to achieve the necessary shape factor. This backer rod should be wider than the gap to have a tight fit. Simply, press the backer rod into the gap to the desired depth for achieving the necessary shape factor, as we previously explained.
- Second, apply an elastomeric sealant such as polyurethane, silicone, or polysulfide, which are the most popular types of modern joint sealants for concrete. You can apply a self-levelling sealant, which, as its name implies, self-levels and does not require any additional tooling. In addition, such products are available in cartridges or tubes, and with various colors, so you can select the color of your choice, and apply with a sealant/caulking gun.
- Third, remove the masking tape.
- Fourth, allow the sealant to properly cure before its exposure to any loads, traffic, or water.

Tips: Do’s and Don’ts when sealing the gap between your garage and driveway
- Do always read and follow the manufacturer’s recommendations for any products in use.
- Do apply the sealant at the average annual temperature, where the joint is in its “neutral” state.
- Don’t use a smaller backer rod for the gap. It will simply float after the application of the sealant. In fact, this is one of the most common problems inexperienced personnel face.
- Don’t use sand to fill the joint. In fact, this is a movement joint, and any incompressible materials can impart its effectiveness and freedom to move. Thus sand can actually cause additional problems such as edge spalling, peaking, and others. Instead, use a compressible filler or backing rods when necessary, depending on the purpose.
- Don’t breed two or more thin backer rods to fill a wide gap. This is a bad practice and can cause problems. Instead, get a single backer rod with the adequate diameter to tightly fit the joint, they are available in a wide range of diameters.
- Don’t twist the backer rod in the joint. Simply push straight for a tight and uniform fit.
- Don’t apply the sealant to a wet joint.
Maintaining the gap between your garage and driveway is simple
Maintaining this joint or “gap” between your garage and driveway is actually simple, especially if you properly filled and sealed it. Thereby, all it requires is the removal and reapplication of the sealant every certain period of time. However, this period depends on the type and quality of the sealant material, exposure conditions, and quality of application of the filling and sealing system. But in general, a high performance polyurethane sealant in such joints can easily last more than five years. As a simple rule, remove and reapply the sealant when its expected service life ends, or when it starts showing failure signs, whichever comes first.
Conclusion
The gap between your garage and driveway is generally an intended gap, referred to as a “joint”. Mainly, sealing it does not require high skills, but requires following a certain procedure including assessment, surface preparation, and sealing. In addition, it is important to properly maintain this joint to ensure its effectiveness.


