7 Concrete Surface Roughness Measurement Methods
Last updated on February 15th, 2023
What is surface roughness?
Surface roughness is the deviation of a profile or a surface from its ideal form. Basically, the ideal form is a virtual line or plane, which is determined based on the mean value of a set of measurements. Most importantly, it represents a reference for the measurement of the deviations. In brief, larger deviations correspond to a rougher surface, and smaller deviations correspond to a smoother surface.
In fact, the term “surface roughness” is common in numerous engineering fields including construction materials, fluid mechanics, and geology. Specifically, these include concrete, steel, core samples, and rocks.
However, this article focuses particularly on the surface profile of concrete, and addresses its importance and measurement methods.
The importance of surface roughness in concrete
First, in order to address this subtopic from a scientific point of view, we will start by introducing the term bond strength in concrete. In brief, bond is the force that holds between two layers or surfaces. Accordingly, the bond strength is the stress capacity of these surfaces to resist their separation.
In fact, bond strength is an essential parameter in applications such as repairs and protective treatments. Besides, it can be directly related to their quality and durability.
In addition, the components that actually form the bond mainly include mechanical interlocking, pure adhesion, cohesion, and others. These fall under the general classification of a bond into chemical, physical, or mechanical.
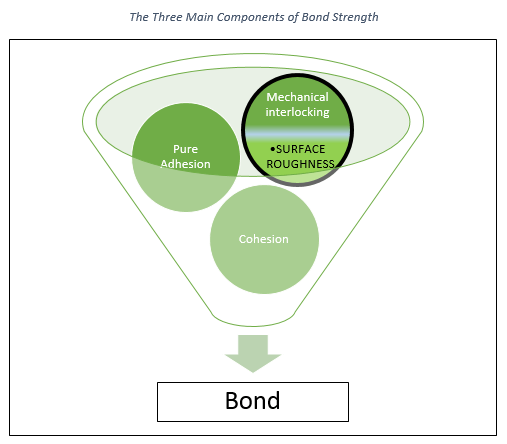
And, by digging deeper into the mechanisms of mechanical interlocking, we will come up with the importance of surface roughness. For example, the surface roughness can influence the mode of mechanical interlocking and modify the contact angle between the existing substrate and the new material. In brief, the interlock mechanisms and contact angles can provide both shear bond strength and tensile bond strength, as shown in the following figure.
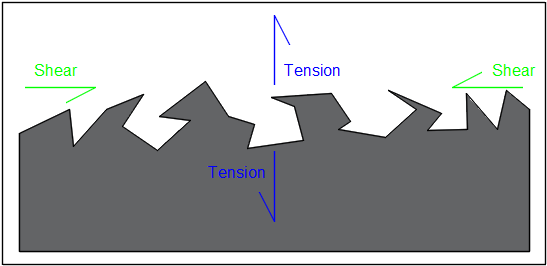
Also, surface roughness can affect the contact surface area, which in terms affects the bond strength.
Thereby, specifications and some popular standards that address concrete surface preparation, concrete repairs, and protective treatments specify the surface roughness requirements or profile depending on the material.
To illustrate, some examples of applications that generally require surface roughness measurement include all types of resin floors (sealers, coating, and flooring), overlays, and repairs.
How to measure the profile of a surface or its degree of roughness?
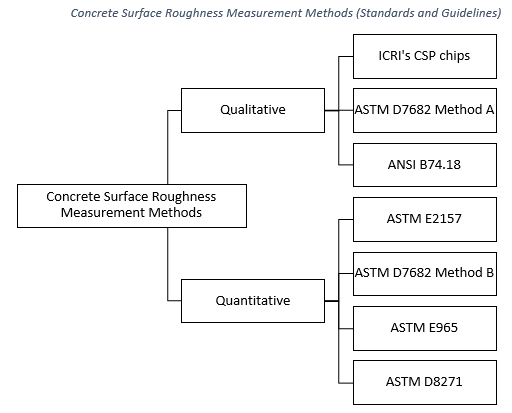
In general, there are several methods to measure the profile of a surface. These methods can be mainly categorized into two groups, qualitative and quantitative methods.
Qualitative methods for determining the surface profile
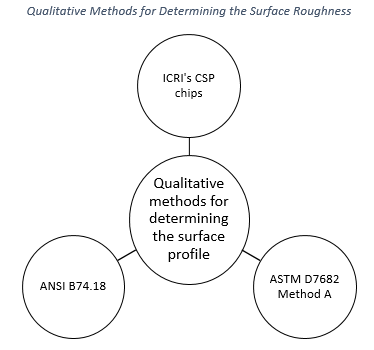
Qualitative surface roughness measurement methods are those that are visual or tactual. In short, they include the comparison with ICRI’s CSP chips, the usage of replica putties according to ASTM D7682 Method A along with ICRI’s CSP chips, and the comparison with abrasive sandpapers according to ANSI B 74.18.
Using ICRI’s CSP chips
In this method, the user compares the surface roughness of concrete to ICRI’s chips, and identifies it with CSP between 0 and 10.
What are ICRI’s CSP chips?
ICRI 310.2R identifies 10 concrete surface profiles, CSP 1 to CSP 10, where the higher the CSP the rougher the surface is. Consequently, ICRI produces replica chips of these CSPs using different surface preparation methods, and are commercially available through their store.
Using replica putties (ASTM D7682 Method A) and ICRI’s CSP chips
ASTM D7682 method A is applicable along with ICRI’s CSP chips as a qualitative surface roughness measurement technique. In fact, it is similar to the previous one, however it is indirect.
Basically, the user creates a replica of the surface roughness, then compares it to ICRI’s chips. First, the user mixes the two components of the putty material (epoxy), places it in its special disk mold, and pushes it into the sound, clean, and dry concrete surface. Then, when the putty sets, the user removes the mold and peels the putty disk off the surface. Hence, this disk represents a permanent replica of the surface roughness, which can be also compared with ICRI’s CSP chips.
Using abrasive sandpaper (ANSI B74.18)
Another method to determine surface roughness of concrete is to compare it to the profile of abrasive sandpapers. In short, this method is mentioned in NACE No. 6/SSPC-SP 13 standard and addressed in ANSI B74.18.
Quantitative surface roughness measurement
Quantitative concrete surface roughness measurement techniques are those that actually measure certain parameters and give scientific values. However, depending on the method and equipment, these parameters can be for a point, line (2d), or surface (3d).
Some of the important quantitative surface profile parameters
In fact, with the advancements in technology, numerous parameters can be directly calculated. However, we will focus on some of the important and commonly used ones, such as the mean profile depth (MPD), mean texture depth (MTD), arithmetical mean deviation (Ra, Sa), root mean square (Rq, Sq), skewness (Rsk, Ssk), and maximum peak to valley height (Rz, Sz).

Surface roughness measurement devices
With the continuous advancements in the field of profilometry, numerous surface roughness testers, or profilometers, emerged in the market. However, these testers can have different working mechanisms, capabilities, and limits, and can present different data and parameters. Hence, it is important to understand the differences between them and their working mechanisms.
What is a profilometer: Definition and classification of surface profilometers
Surface profilometers are devices which can measure topographical parameters and quantify the roughness of a surface. In fact, they can be classified into two main types, contact and non-contact testers.
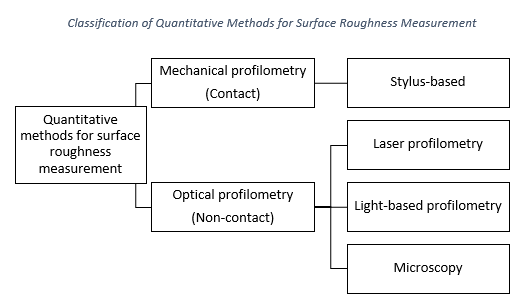
Contact (stylus profilometers)
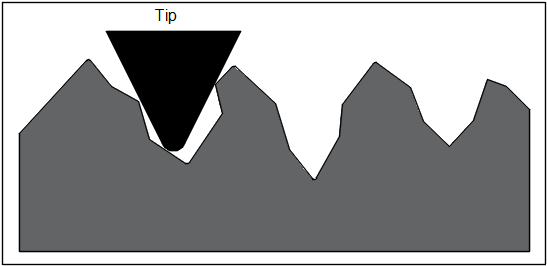
Stylus profilometers are instruments which work mechanically upon the direct contact with the surface to quantify its roughness. Mostly, they are based on a diamond stylus which measures the perpendicular variations.
Non-contact profilometers
Non-contact profilometers are instruments which use optical methods to measure the roughness of a surface. Besides, they can be compact and portable, fixed on machines or vehicles, or fixed for laboratory uses, depending on their type and working mechanisms.
In addition, the optical methods include microscopy (light and electron), light profilometry, and laser profilometry. To illustrate, two common examples of non-contact gauges include the circular track (CT) meter and light profilometers based on the confocal chromatic aberration method.
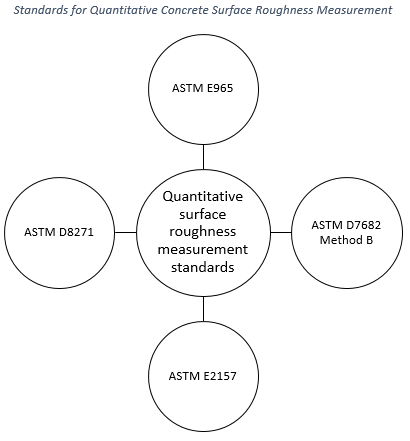
Four quantitative surface roughness measurement standards
ASTM E965
ASTM E965 is a standard test for measuring the surface macrotexture depth. Besides, it is also known as the sand patch test, since silica sand was traditionally used, but then replaced with round glass spheres. In short, it involves spreading a certain volume of glass spheres circularly until the surface texture of concrete is exposed. Hence, the mean texture depth can be determined based on the average diameter and area covered, following a specific equation.
ASTM D7682 Method B
ASTM D7682 is a standard test method for replication and measurement of concrete surface profiles using replica putty. In fact, method B of this test quantifies the profile depth of the replica disks obtained in method A (which we previously addressed in the qualitative methods). In brief, this method uses a special micrometer to take at least ten measurements per replica disk. Then, the user determines the profile depth range based on these surface roughness measurements.
ASTM E2157
ASTM E2157 is a standard method for measuring pavement macrotexture properties using the circular track meter. In short, it uses a laser sensor which rotates in a circular motion, at a certain height from the surface, to measure the mean profile depth (MPD) and the root mean square (RMS). In addition, this device is connected to a computer where a special software performs the calculations.
ASTM D8271
ASTM D8271 is a standard test method for the direct measurement of the surface profile of concrete.
Conclusion
Surface roughness is a vital part of bond strength, which is an important parameter in applications such as repairs and protective treatments. To sum up, its measurement methods can be categorized into two types, qualitative and quantitative.
Bibliography
- Brna, M., & Cingel, M. (2020). Comparison of Pavement Surface Roughness Characteristics of Different Wearing Courses Evaluated Using 3D Scanning and Pendulum. MATEC Web of Conferences 313, 00013. EDP Sciences.
- Fisco, N., & Sezen, H. (2013). Comparison of Surface Macrotexture Measurement Methods. Journal of Civil Engineering and Management, 19.
- Garbacz, A., Courard, L., & Kostana, K. (2006). Characterization of Concrete Surface Roughness and its Relation to Adhesion in Repair Systems. Materials Characterization, 56(4-5), 281-289.
- ICRI Committee. (2013). ICRI 310.2R Selecting and Specifying Concrete Surface Preparation for Sealers, Coatings, Polymer Overlays, and Concrete Repair. International Concrete Repair Institute.
- Mokarem, D. W. (2006). Use of the Digital Surface Roughness Meter in Virginia. Charlottesville, VA: Virginia Transportation Research Council.
- NACE International, & SSPC Group Committee. (2003). Joint Surface Preparation Standard NACE No. 6/SSPC-SP 13 Surface Preparation of Concrete. Houston TX, and Pittsburgh PA: NACE International and SSPC: The Society for Protective Coatings.
- Rudawska, A. (2019). Surface Treatment in Bonding Technology. Bonding technology, 7-46.
- Santos, P. M., & Júlio, E. N. (2010). Comparison of Methods for Texture Assessment of Concrete Surfaces. ACI Materials Journal, 107(5), 433-440.
