A Striking Touch: The Burnt/Burnished Concrete Finish

Last updated on July 20th, 2025
The Ultimate Guide to Burnt/Burnished Concrete: Industrial Chic Meets Modern Luxury
Introduction: The Allure of Raw Elegance
In the world of concrete finishes, few evoke the same powerful blend of rugged industrial heritage and sophisticated contemporary style as the burnt or burnished concrete finish. Often spoken of interchangeably, though technically distinct in origin, this finish transforms humble concrete slabs into stunning architectural features. Characterized by its high-gloss, mirror-like sheen that highlights the unique texture and natural variations within the concrete itself, burnt/burnished concrete offers unparalleled durability, low maintenance, and a truly unique aesthetic. This comprehensive guide dives deep into everything you need to know about this captivating finish – its process, benefits, applications, care, and why it might be the perfect choice for your next project.
1. Untangling the Terms: Burnt Finish vs. Burnished Concrete
- The “Burnt” Misnomer: Historically, achieving a high-gloss finish on terrazzo or early concrete involved intense friction and heat generation using heavy, often abrasive, mechanical means. This process could literally burn the surface, oxidizing it slightly and creating a very hard, dense, and shiny layer. Hence, the term “burnt finish” originated.
- Modern Burnishing: Today, the process is far more refined and controlled. The term “Burnished Concrete” accurately describes the modern method used to achieve the high-gloss effect, primarily through mechanical polishing techniques without relying on excessive heat or burning. While the intense friction can generate significant heat, the goal is polishing and densifying, not charring.
- Common Usage: In contemporary architecture and design, “burnt concrete” and “burnished concrete” are frequently used synonymously to describe the final high-gloss aesthetic result. When discussing the process, “burnished concrete” is technically more accurate for modern installations, though “burnt finish” still lingers descriptively for the look.
2. How Burnished Concrete Achieves its Signature Sheen: The Process Unveiled
The journey to a flawless burnished finish is multi-stage, demanding precision and skill. It begins with a properly placed and cured concrete slab (ideally designed for polishing). Here’s the typical process:
Step 1: Initial Grinding (Coarse Grit – 40 to 100 Grit Metal Bonds)
- Purpose: Remove surface imperfections, laitance (weak surface layer), coatings, glue residues, or old finishes. Levels minor inconsistencies. Opens the surface texture.
- Equipment: Heavy-duty planetary grinders with coarse diamond abrasive segments (metal bond).
Step 2: Fine Grinding (Medium Grit – 100 to 400 Grit Resin Bonds)
- Purpose: Refine the surface, progressively smoothing it and removing scratches from the coarse grind. More aggregate (stones) becomes exposed depending on the desired look. Prepares the surface for densification and polishing.
- Equipment: Planetary grinders transitioning to resin-bond diamond abrasives.
Step 3: Concrete Densification/Hardening (CRITICAL STEP)
- Purpose: This is the secret weapon. A liquid Lithium Silicate or Sodium Silicate-based chemical hardener is applied to the prepared concrete surface. These penetrating liquids react with the free lime and calcium hydroxide within the concrete, forming additional calcium silicate hydrate (C-S-H) – the primary binder in concrete itself.
- Result: This reaction permanently hardens the surface (significantly increasing scratch and abrasion resistance), reduces dusting, improves clarity in the aggregate, and dramatically improves the concrete’s ability to take a polish. The densifier makes burnishing to a high gloss feasible and durable.
Step 4: Intermediate Polishing (800 to 1500 Grit Resin Bonds)
- Purpose: After densifier curing (usually overnight), polishing resumes. Resin-bond diamonds in finer grits (800, 1500) refine the surface further, enhancing clarity and developing the initial honed sheen. Any imperfections become much more noticeable at this stage.
Step 5: The Burnishing Process (2000+ Grit & Burnishing Pads)
- Mechanical Polishing (2000-3000+ Grit): Finer resin-bond polishing pads (up to 3000 grit or higher) create a very smooth, honed, satin-like sheen, common in “standard” polished concrete. This is the stopping point for polished concrete.
- Burnishing (The Key Differentiator): To achieve the “burnt” or burnished effect, contractors go beyond mechanical polishing:
- High-Speed Burnishing: Equipment shifts to high-speed burnishers (typically 1500-3000 RPM or higher) equipped with specialty diamond-impregnated resin pads or non-diamond abrasive pads.
- Friction and Heat Generation: The extreme friction generated at high speeds creates significant surface heat.
- The Burnishing Effect: This intense friction acts in two ways:
- Melting/Plasticizing: It slightly melts or plasticizes the resin matrix within the densified concrete surface and within the polishing pad itself (if resin-bond pads are used).
- Compacting and Fusing: As the plasticized material cools under pressure, it compacts, levels micro-scratches, and fuses, creating an incredibly smooth and dense surface layer.
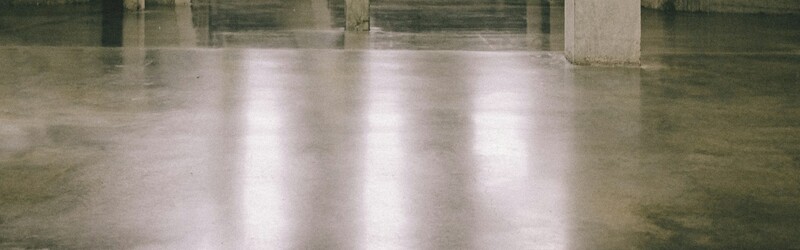
- Mirror Reflection: This ultra-dense, ultra-smooth surface is what reflects light so uniformly, creating the signature high-gloss, mirror-like, often wet-look finish of true burnished concrete. The process essentially “seals” the surface at a microscopic level through friction and heat.
Step 6: Guarding the Gloss: Protective Sealer (Optional but Recommended)
- Purpose: While the burnished surface is extremely hard, an additional penetrating or topical guard specifically designed for high-gloss polished floors can be applied. This provides enhanced:
- Stain Resistance: Against oils, dyes, and chemicals.
- Ease of Cleaning: Creates a superior barrier.
- Gloss Retention: Helps preserve the mirror shine over time and traffic.
- Enhanced Depth: Can add a subtle extra layer of clarity.
- Type: Typically penetrating silane/siloxane sealers or mild topical nano-coatings. Thick film-forming sealers (like epoxies or urethanes) are generally avoided as they can dull the inherent burnished shine and scratch more visibly.
- Purpose: While the burnished surface is extremely hard, an additional penetrating or topical guard specifically designed for high-gloss polished floors can be applied. This provides enhanced:
3. Why Choose Burnished Concrete? Compelling Benefits
Burnished concrete offers a potent combination of aesthetic appeal and robust performance:
Striking Aesthetic Appeal:
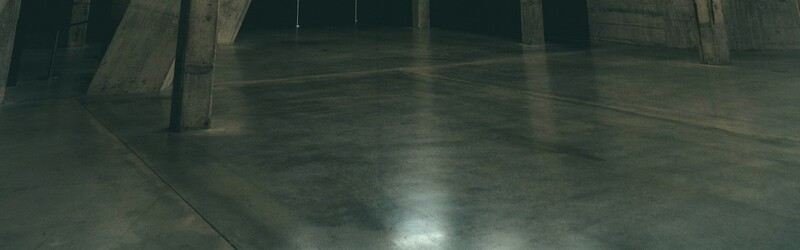
- High-Gloss Finish: Creates a luxurious, sophisticated, modern, and often dramatic visual impact. The mirror effect amplifies light and space.
- Unique Character: Highlights the natural beauty within concrete – aggregate size, color variations, subtle texture. No two floors are identical.
- Versatile Design: Works exceptionally well in industrial, modern, minimalist, loft-style, and even high-end contemporary settings.
- Aggregate Exposure: Level can be controlled during grinding (Salt & Pepper, Moderate Exposure, Full Exposure) to achieve different looks within the glossy finish.
Unmatched Durability & Longevity:
- Extreme Hardness: The densification and burnishing process creates an incredibly hard, abrasion-resistant surface. It withstands heavy foot traffic, rolling loads, and impacts better than many alternatives.
- Resists Wear: Properly installed, it lasts decades with minimal wear, making it a highly sustainable choice.
Superior Low Maintenance:
- Easy Cleaning: Requires only sweeping, dust mopping, and occasional damp mopping with a neutral pH cleaner. No waxing or stripping needed.
- Resistance: Excellent resistance to stains (when sealed), scuffs, and dust (thanks to densification).
Enhanced Light Reflectivity:
- Energy Savings: The high-gloss finish reflects ambient and artificial light, reducing the need for overhead lighting and potentially lowering energy costs.
- Brightness: Makes interior spaces feel brighter and larger.
Hygienic & Eco-Friendly:
- Non-Porous: The dense, sealed surface inhibits mold, mildew, and bacterial growth.
- Low VOC: Uses the existing concrete slab. Densifiers and guards are typically low-VOC products. Reduces landfill waste from replacing other floor coverings.
Cost-Effective Lifecycle Value:
While the upfront installation cost can be moderate to high, its exceptional durability and minimal maintenance costs make it very economical over its lifespan compared to materials like tile, stone, or epoxy that may need replacement or extensive recoating.
4. Applications: Where Burnished Concrete Shines
This versatile finish elevates a wide range of spaces:
- Retail: Boutiques, flagship stores, shopping malls (common areas). The luxurious look enhances brand image.
- Restaurants & Bars: Upscale dining, cafes, breweries. Durable against spills, traffic, and cleaning. Creates a sophisticated ambiance.
- Commercial Lobbies & Offices: Corporate headquarters, tech offices, co-working spaces. Projects professionalism, modernity, and is easy to maintain.
- Museums & Galleries: Provides a neutral, elegant backdrop that enhances artwork without competing.
- Residential: Increasingly popular in modern homes – living areas, kitchens, hallways, basements. Creates a seamless, high-end look. Use caution in bathrooms due to slickness – ensure a textured sealer.
- Educational & Institutional: Universities (libraries, student centers), hospitals (lobbies, non-critical care corridors) – where durability and low maintenance are paramount.
- Industrial Chic Spaces: Lofts, studios, event venues. Celebrates the raw material with maximum sophistication.
5. Design Possibilities & Aesthetic Variations
Burnished concrete is far from monolithic in appearance. Key variables influence the look:
- Aggregate Exposure Level: (Set during initial grinding)
- “Cream” Finish: Minimal aggregate exposure, primarily the cement paste – smoothest surface, most uniform color, highest potential gloss but less character.
- “Salt & Pepper”: Light exposure of fine aggregate near the surface – subtle flecks, maintains high smoothness and gloss.
- “Moderate Exposure”: Deeper grind exposing small and some medium aggregate – more pronounced texture and color variation, high gloss still achievable.
- “Full Exposure” or “Terrazzo-Like”: Deep grind exposing the full spectrum of aggregates (up to large stones and decorative elements added during pour). Maximum texture, color pop, and character. Gloss may have micro-texture reflections due to aggregate height differences but remains visually stunning.
- Base Concrete Color: Standard gray, integrally colored concrete (earth tones, blacks, whites), or white cement. Color choices significantly impact the final look.
- Decorative Aggregates: Marble chips, colored glass, shells, metal fragments, or specific stones can be seeded into the surface before burnishing for a customized terrazzo effect.
- Gloss Level: The intensity of the burnishing process can subtly influence the final sheen level, though high-gloss is the norm. Lower levels (“hone” or “satin”) stop before the high-speed burnishing step.
6. Important Considerations & Potential Drawbacks
While exceptional, burnished concrete isn’t without considerations:
- High Initial Cost: The installation process is labor-intensive and requires specialized equipment and expertise, making it more expensive upfront than basic finishes, epoxy coatings, or carpet. ($6 – $15+ per sq. ft., highly variable).
- Skill-Dependent Installation: Achieving a truly flawless, high-gloss finish requires extreme attention to detail at every stage (prep, grinding flatness, densifier application, polished prep, burnishing technique). Imperfections in the slab (cracks, settlement, trowel marks, air pockets) become glaringly obvious under the gloss and magnification. Choosing a highly experienced, reputable contractor specializing in high-gloss burnishing is paramount.
- Surface Coldness & Hardness: Like all concrete, it feels hard underfoot and is cold to the touch. This can be mitigated with radiant heating systems.
- Slickness When Wet: The smooth, glossy surface can become slippery when wet. This is a critical consideration in bathrooms, pool decks, or entrance ways. Solution: Specify a sealer with anti-slip additives (sacrificing some gloss clarity) or incorporate micro-texture during the final burnishing steps. Area rugs/mats are also practical.
- Sound Reflection: The hard, glossy surface can create an echo or increase ambient noise levels in large spaces. Incorporate soft furnishings, rugs, wall treatments, and acoustic panels.
- Existing Slab Challenges: Achieving a perfect burnished finish is easiest on new slabs specifically designed for polishing (correct strength, slump, placement, finish). Retrofitting existing slabs requires thorough assessment for cracks, previous coatings, flatness, and moisture issues, which can increase cost and complexity or limit results.
- Moisture Sensitivity: Even with densifier, concrete remains vapor permeable. Significant moisture vapor emission through the slab can potentially lead to adhesive failure under coatings, but is less critical for a finished burnished surface itself. Pre-installation moisture testing is advised for critical applications.
7. Burnished Concrete vs. Alternatives: Key Comparisons
- Polished Concrete: Similarity: Same initial process through densification and mechanical polishing (often up to 3000 grit). Difference: Polished concrete stops at the mechanical polish stage, resulting in a honed or satin finish (matte to soft sheen). Burnishing adds the high-speed step to achieve the intense, mirror-like gloss. Burnished is essentially a specific type of polished concrete with the highest gloss level.
- Epoxy & Urethane Coatings: Pros: Can be very glossy, offer extensive color/design options, good chemical resistance. Cons: Thick film feels synthetic/plastic-like to some, scratches show readily on the surface, degrades under UV light (yellowing/chalking), requires eventual recoating (5-15 years), sensitive to moisture vapor transmission (MVT), can be more slippery, and hides the natural concrete substrate. Burnished concrete showcases the raw beauty of the concrete.
- Natural Stone/Terrazzo: Pros: Naturally beautiful, luxurious, unique patterns, durable. Cons: Significantly higher material and installation cost, requires sealing, grout lines, potential for cracking/chipping. Burnished concrete offers a similar high-gloss “terrazzo-look” aesthetic at a potentially lower cost using the base slab.
- Tile: Pros: Vast design options, durable. Cons: Grout lines (hard to clean/discoloration), brittle (potential for cracking/chipping), requires frequent resealing (natural stone), installation labor intensive. Burnished offers a seamless, monolithic look.
- Luxury Vinyl Plank (LVP): Pros: Lower cost, warmer/softer underfoot, easier DIY, good moisture resistance. Cons: Perceived as less premium, surface can scuff/dent, seams can lift, lacks the depth and uniqueness of burnished concrete, lifespan shorter. Burnished concrete is significantly more durable and permanent.
8. The Investment: Burnished Concrete Cost Factors
Understanding the variables influencing cost is crucial:
- Slab Condition: New vs. existing (retrofitting adds cost). Flawless new slabs are optimal. Existing slab repairs, leveling, coating removal significantly increase costs.
- Desired Finish & Aggregate Exposure: Higher gloss (“cream”) may require more passes. Full aggregate exposure requires deeper, more labor-intensive grinding.
- Slab Size: Larger areas offer some economies of scale ($/sq. ft. may decrease slightly). Very small areas can have high minimum charges.
- Project Complexity: Number of rooms, obstacles (columns, pipes), tight corners, and stairs.
- Decorative Elements: Adding seeded aggregates or integral color increases material costs.
- Site Logistics: Access, working hours, adjacent materials needing protection.
- Contractor Expertise & Reputation: High-end specialists command premium rates but deliver superior results. Don’t choose based solely on lowest price for this finish.
- Geographical Location: Labor and material costs vary regionally.
Approximate Cost Range (Highly Variable):
- Basic Burnished (Retrofit, Moderate Exposure): $6 – $9 / sq. ft.
- Standard Burnished (New Slab, Moderate/S&P Exposure): $8 – $12 / sq. ft.
- High-End Burnished (New Slab, Cream/Full Exposure, Seeded Agg): $10 – $15+ / sq. ft.
Cost Component | Low End ($/sq.ft.) | High End ($/sq.ft.) | Notes |
Surface Preparation | $1.00 – $2.00 | $2.50 – $4.00 | Existing removal, crack repair, leveling add |
Grinding (Coarse/Medium) | $1.50 – $2.50 | $3.00 – $4.50 | Depends on exposure level |
Chemical Densification | $0.50 – $1.00 | $1.00 – $1.50 | Essential step |
Polishing (Fine Grit) | $1.50 – $2.50 | $3.00 – $4.50 | Prep for burnishing |
Burnishing Process | $2.00 – $3.50 | $4.00 – $6.00+ | High-skill step (main cost driver) |
Sealing/Guarding | $0.50 – $1.25 | $1.00 – $2.00 | Recommended for protection |
Decorative Elements | N/A | $2.00 – $7.00+ | Integral color, aggregates, patterns |
Complexity/Small Areas | Add 15-25% | Add 20-50% | Stairs, columns, obstacles |
TOTAL RANGE | $6.00 | $15.00+ | Varies wildly based on project specifics |
9. Choosing the Right Contractor: Your Key to Success
Selecting the installer is arguably the most critical decision:
- Specialization is Key: Seek contractors with proven experience specifically in high-gloss burnished concrete. Don’t assume a regular concrete or polishing contractor has this expertise. Ask for burnished portfolio examples.


